Photoelasticimetry
Experiment number : 1951
Goal of experiment
This experiment demonstrates a practical application of polarized light.
Theory
Light is a transverse electromagnetic wave which is described by the vector of electric intensity \(\vec E\). This vector is always perpendicular to the direction in which the wave propagates. If the vector \(\vec E\) arbitrarily changes its direction in the plane perpendicular to the light beam, we describe the light as unpolarized. Using various methods, this type of light can be transformed into linearly polarized light, where the vector \(\vec E \) oscillates in a straight line.
We can obtainpolarized light using refraction and reflection, double refraction, or absorption by a polarizing filter. These filters, also known as polaroids, consist of two layers of a plastic material. Between these layers is a substance with relatively long molecules. When the polaroid is manufactured, these molecules are technologically aligned in such a way that their lengthwise axis are parallel. Because the environment is anisotropic, the unpolarized light beam is split upon impact into two rays; the ordinary ray, and the extraordinary ray. These two rays generally propagate in different directions and with different velocities. Both are linearly polarized. the ordinary ray is absorbed while traversing the polaroid and only the extraordinary ray, which is fully polarized, passes through. a polaroid dims the passing light. Not only can we use polaroids to polarize light, they can also be used to distinguish polarized light.
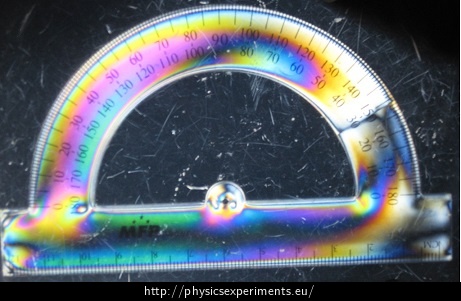
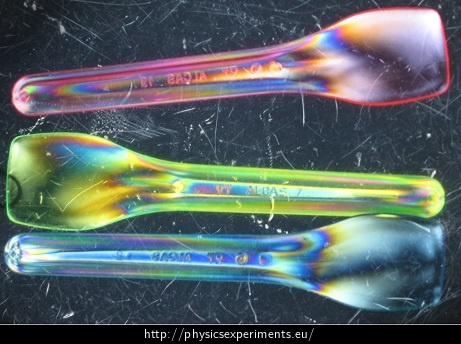
Photoelasticimetry is an experimental method which examines the spread of mechanical stress in a material. This method utilises artificial anisotropy, which is caused by mechanical deformation of a material illuminated with polarized light. By observing the material through a polarizing filter, we can detect the typical interference patterns. These patterns inform us about the spread of mechanical stress; the denser the stripes are in a location, the greater the mechanical stress is in that location.
Tools
Two pieces of polarizing foil, a ruler or another object made of transparent plastic.
Procedure and sample result
- We put the ruler between the two pieces of polarizing foil.
- We observe the colourful pattern (see the photos below).
- We can repeat this experiment with different tools and compare the spread of mechanical stress in each of them.
- We can change the internal stress by deforming the plastic tools and observe how the pattern changes.


Technical notes
- The experiment needs to be conducted in a brightly lit room, ideally observed directly against a source of light.
- It is possible to use e.g. polaroid glasses instead of the polarizing foil.
Pedagogical notes
- We can use the polarizing foil to demonstrate that reflected light (e.g. off a water surface) is partially polarized.
- Similarly, the polarization of light emitted by an LCD-type display can also be shown.


